pinkstuff1.jpg

Recipes Index

I like to cook. And I'm undaunted by the challenge of cooking for folks with restricted diets for reasons of celiac disease, digestive intolerances or allergies. Some of my favorite recipes are housed here-- feel free to poke around and see what looks good!

Bill Granger's Corn Fritters (low FODMAP version)
 

This is a recipe I’ve been making for over 20 (!) years, after first tasting them at a restaurant called Bill’s in Sydney Australia. The Bill of Bill’s is Bill Granger, an internationally-loved chef and author of multiple cookbooks, in which different versions of this recipe make cameos. This is a gluten-free, dairy-free and low FODMAP version that I make for potlucks, Friendsgivings and whenever I need a scalable, cheap and easy crowd-pleasing dish to share.


Bill Granger’s Corn Fritters (low FODMAP version)

Ingredients:

  • 1 cup gluten-free 1-to-1 flour (I use Bob’s Red Mill brand)

  • ¼ tsp baking powder

  • ½ tsp sea salt

  • 1 tsp ground coriander

  • ½ tsp ground cumin

  • 1 tsp sweet paprika

  • 1 egg, lightly beaten

  • 1 tsp lemon juice

  • 3 cups frozen corn kernels, thawed

  • 4 spring onions, greens only, thinly sliced

  • 3 tbsp chopped cilantro

  • Olive or canola oil for frying

Directions:

  1. Place the flour, baking powder, salt, coriander, cumin and paprika in a bowl.

  2. Add the egg, lemon juice and 1/2 cup of water and beat to a smooth batter

  3. Add the corn, spring onion and chopped cilantro and stir to combine

  4. Heat the oil in a frying pan over a medium heat and spoon in ~2 heaping TBSP of the mixture for each fritter once oil is hot. Flatten with a spatula and cook for 2 minutes per side until golden and cooked through. Repeat with the remaining mixture.

  5. Taste for salt; sprinkle cooked fritters with additional salt to taste if needed.

While these fritters are deelish all by themselves, you can also serve them alongside a dip or condiment of your choice. In summer, a mango salsa would be lovely. In winter, a creme fraiche might hit the spot. A spicy condiment— a harissa or sriracha mayo— would not be out of place atop these gorgeous golden fritters either.

Click here to return to Recipe home

Strawberry Poppy Muffins (FODMAP friendly)
 

Every June, our family heads upstate to go strawberry picking in picturesque Warwick, NY. And every June, I am faced with an embarrassment of strawberry riches to process while they’re still fresh. This year, I pulled together a delightful recipe for Strawberry Poppy Muffins, with adjustments so they can be sent into school for my kids’ classmates on gluten free/dairy free diets. As with everything I bake, I keep the added sugar on the lower side, so these lovely babies are just sweet enough.


Strawberry Poppy Muffins (FODMAP friendly)

Ingredients:

  • 1 3/4 cups of spelt flour (*contains gluten) OR Bob’s Red Mill Gluten Free 1 to 1 baking flour

  • 1/3 cup rolled oats, plus more for sprinkling on top (use gluten free oats if needed)

  • 1 teaspoon baking powder

  • 1/2 teaspoon baking soda

  • 1 tablespoon poppy seeds

  • 1/2 teaspoon kosher salt

  • 1/3 cup olive oil

  • 1/3 cup maple syrup

  • 2 eggs

  • 1 cup plain Green Valley Creamery lactose free yogurt OR plain/unsweetened coconut milk yogurt (So Delicious brand, dairy-free)

  • 2 teaspoons vanilla extract

  • 2 cups diced ripe strawberries— roughly corresponds to 1 lb of strawberries.

  • To garnish: sugar (white, turbinado, coconut… your choice)

Directions:

  1. Preheat oven to 400 degrees Farenheit. Grease muffin tin with oil spray or butter if not using a non-stick pan.

  2. In a large mixing bowl, combine the spelt or gluten free flour (your choice), 1/3 cup oats, baking powder, baking soda, salt and poppy seeds. Mix to distribute ingredients evenly and set aside.

  3. In a separate medium bowl, combine the oil, maple syrup and eggs, Whisk well with a fork until a bit frothy and well-combined. Then, add the yogurt and vanilla and whisk again until the mixture is smooth, evenly colored pale yellow, and well combined.

  4. Pour the wet mixture into the dry mixture and mix with a large rubber spatula until just combined. Then, add the diced strawberries and gently fold them into the batter until evenly distributed; be sure all the flour is mixed in fully to the batter as you fold. (Don’t worry if this batter looks thicker than your typical muffin mixture; the ripe strawberries will give off some water while the muffins bake, so you don’t want to start off with too wet/thin a batter!)

  5. Divide the batter evenly among your 12 muffin cups. They will be pretty filled to the top.

  6. Sprinkle each muffin top with a pinch of oats and a pinch of sugar. Bake for about 20 minutes (gluten free flour may take a little bit longer to bake than spelt flour). Muffins are ready when they’re a bit golden on top and a toothpick inserted into the center comes out clean.

  7. After removing from oven, allow muffins to cool before removing from tin to store. Seal them in an airtight container and eat within 2 days if storing at room temperature, or freeze them and enjoy them throughout the summer!

Click here to return to Recipe home

Roasted Eggplant with Tahini and Pomegranate
 

While the rhythms of our social life signal fall, the Farmer's markets and backyard gardens alike are still sending off summery signals, and one of them is a bounty of eggplant.  

I came late to the eggplant game, having decided at some point in childhood or early adulthood that I didn't like it.  It was only after being invited to a dinner party at the home of a vegetarian of Iraqi descent did I realize that I liked eggplant.  A lot. At least, I liked eggplant the way he made it.

This recipe is a little bit inspired by my friend Amos and a little bit inspired by the flavors of the great vegetarian chef, Yotam Ottolenghi.  It's total Mediterranean diet fare, and perfect for this time of year, when eggplants are abundantly available and pomegranates are just starting to show up in the supermarket.

This recipe is naturally gluten-free, dairy-free/vegan and can be easily adjusted to be low FODMAP as described in the directions below,

Roasted Eggplant with Tahini and Pomegranate

Ingredients: 

  • 1 medium/large eggplant
  • Olive oil
  • 1/4 cup tahini paste
  • 1/2 tsp ground cumin
  • 1/4 tsp kosher salt
  • 1 TBSP lemon juice
  • 1 medium garlic clove, minced or crushed (omit to make the recipe low FODMAP)
  • Hot water
  • Garnishes (optional but highly recommended): cilantro, parsley, fresh mint leaves and/or pomegranate seeds***

Directions:

  1.  Pre-heat oven to 425 degrees farenheit and line 2 large baking trays with parchment paper
  2.  Prep eggplant for roasting as follows:
    • Peel if you dislike the skin (or find it difficult to tolerate digestively).  Otherwise, leave the skin on.
    • Cut eggplant into 1" cubes
    • Arrange eggplant cubes on a paper towel lined plate (choose dye-free paper towels), sprinkle lightly with kosher salt, and microwave on high for about 5-8 minutes or until cubes are shriveled to about half their original size. (This will help reduce the eggplant's absorptive capacity so it doesn't sop up all the roasting oil and get greasy.)
  3. Remove the shriveled eggplant from microwave and transfer them to the parchment lined baking trays.  Drizzle enough olive oil on each tray to coat the cubes lightly and toss gently with your hands to disperse the oil evenly.
  4. Roast eggplant in the oven for 14-18 minutes, or until cubes are soft and some have begun to caramelize. (Toss the pieces after 7-8 minutes to help ensure even browning.)
  5. Meanwhile, while the eggplant is roasting, prepare the tahini sauce as follows:
    • Combine tahini paste in a small bowl with the lemon juice, cumin, salt and garlic***  Stir all ingredients to combine.
    • Start adding hot water 1 TBSP at a time, mixing as you go, to thin the the tahini mixture into a drizzly sauce.  
  6. Drizzle tahini sauce on roasted eggplant cubes, top with garnishes and serve.

***Note: To make low FODMAP, omit the garlic.  You can replace it with 1 TBSP garlic infused olive oil for the flavor without the FODMAPs if you wish.  Up to 1/4 cup of pomegranate seeds is considered a low FODMAP serving.  

Click here to return to Recipe home

Butternut Squash Souffle
 

If you thought that the children of dietitians spring forth from the womb with a congenital love of orange vegetables, you would be mistaken.  I've been cooking for my littles for almost seven years, and they've yet to embrace winter squash... with the exception of this recipe for Butternut Squash Souffle, which we call "squash cake" at home for marketing purposes. Yes, it's got added sugar in it, which makes it less righteous than, say, a kale salad. But I surrendered my moral high ground when I traded in my Prius for a minivan. So my kids eat a vegetable that's been enhanced with sugar. Judge me all you want. I think they deserve at least half credit.

Squash souffle a great fall side dish recipe for your Thanksgiving table and holiday potlucks. Leftovers make a lovely brunch base: top with eggs, melted cheese, leftover grilled asparagus spears or anything else you can think of. 

Butternut Squash Souffle

Ingredients: 

  • 20oz cubed butternut squash, steamed until very soft and mashed (or two 10-oz packages of frozen pureed winter squash)
  • 1/2 cup flour of your choice (I use Bob's Red Mill 1 to 1 Gluten-free baking flour; almond flour also works great)
  • 1/4 cup + 1 TBSP sugar (separated)
  • 1/4 cup oil (olive or canola)
  • 3 eggs
  • 1.5 cups milk of your choice (conventional or lactose-free cow's milk and almond work equally well)
  • 2 TBSP cinnamon

Directions: 

  1. Preheat oven to 350 degrees F
  2. Prepare your squash (steam your raw cubes and them mash them into a puree... or defrost the packages of frozen puree) and set aside
  3. Mix together the cinnamon with the 1 TBSP sugar you set aside
  4. In a separate bowl, beat the eggs and then add in flour, 1/4 cup of the sugar, oil and milk.  Beat until well combined.
  5. Add squash to the egg mixture and stir to combine well
  6. Spray a 9 x 13" OR 9" round baking dish with non-stick spray, and pour mixture into baking dish 
  7. Bake for 30 minutes, then remove from oven to sprinkle top with cinnamon/sugar mixture. 
  8. Put back in oven and bake an additional 30 minutes, or until the souffle is set. (It should be firm to the touch in the center; baking time will vary based on size of the baking dish you use)
  9. Remove from oven and let cool for at least 20 minutes before serving.  

NOTE: If you serve it still warm, the souffle will be yummy but have an un-formed souffle/spoonbread type consistency. If you serve it fully cooled (or refrigerate overnight and reheat the next day), you can cut it into squares or wedges and they will hold their shape like a cake; hence the nickname "squash cake."

Serve warm, room temperature or cold.

Click here to return to Recipe home


Goat's Milk Labneh Dip
 

Goat's Milk Labneh Dip (image T.Freuman)

Labneh is a thick, creamy Middle Eastern yogurt dip, traditionally topped with a pool of olive oil and heavy sprinkle of za’atar– a green herbal mixture that features some combination of thyme, hyssop, oregano and/or marjoram with sesame seed and salt.  (Some versions also contain sumac.) Alongside better-known mezze staples like hummus and babaganoush, labneh makes a delicious topping for pita bread or–in our case– gluten-free alternatives.  

Labneh is hard to find in stores, even here in the New York area.  So when my mother-in-law showed up here with a huge vat of it–that she made herself (!!)– I naturally started plying her for the recipe. As it turns out, making homemade Labneh is so ridiculously easy that she didn’t even have a recipe.

Goat's Milk Labneh Dip

Directions:

  1. Line a sieve or fine strainer with cheesecloth, a thin tea towel or two layers of paper towels.
  2. Place it over a large pot.
  3. Dump a 32 oz container of plain, whole milk goat's milk yogurt* in it (you can use Cow's milk or Lactose-free cow's milk yogurt as well)
  4. Leave it out at room temperature for 2 hours.
  5. Remove and discard the liquid from the pot.  Refrigerate the strained yogurt until it is cold again.
  6. To serve: Spread onto a serving plate. Top with a pool of high-quality olive oil (fancy ones are great here, as you will really taste the nuanced flavors… a nice, green grassy one will be LOVELY).  Sprinkle generously with Za’atar, which you will need to buy at a specialty shop or online.  You can find it in supermarkets with a large selection of imported food products from Israel or the Middle East, at ethnic specialty markets like Kalustyan’s in New York City, or online.  This dish makes a great appetizer, or a fabulous, savory breakfast spread.

I made mine with plain goat's milk yogurt, which is lower lactose than cow's milk yogurt... and lower still after straining even more liquid from it; after draining for two hours, about 1/3 cup of liquid had seeped through the paper towels into my pot.  I think goat's milk yogurt gives a hint of the signature, musky twang of goat cheese that I love. You can use lactose-free cow's milk yogurt (Green Valley Organics) if you need to be sure your Labneh is fully lactose-free.

Click here to return to Recipe home

Gluten Free Quinoa Matzoh Balls
 

Gluten Free Quinoa Matzoh Balls (image T. Freuman)

Nothing says Passover like matzoh ball soup, the original Jewish comfort food. Feeling under the weather? Have some matzoh ball soup.  Depressed?  Have some matzoh ball soup. Homesick? Defrost some of mom’s matzoh ball soup.   Matzoh ball soup devotees tend to fall into one of two camps: those who prefer a feather-light “floater,” and those who prefer a firm, dense “sinker.”

Of course, for those of us who can no longer partake in matzoh or its glutinous derivatives such as the matzoh meal used to make matzoh balls, the soup course of the Passover Seder is a sad, sad time.  What’s more depressing than spending two hours recalling your ancestors’ persecution and suffering, only to be served a steaming bowl of plain, matzohball-less broth? While I’ve tolerated this indignity in years past, I decided that this year, it was time to MMODGFMB.  That’s Hebrew for: make my own damn gluten-free matzoh balls. Enough was enough.

II decided to see if I could find a gluten-free flour that was also kosher for Passover with which to fashion my GF matzoh balls.  I even consulted the family Rabbi, who confirmed what I had hoped: quinoa is considered by most authorities to be kosher for Passover.  Now, without delving into theological intricacies, I will mention that quinoa flakes may or may not be processed in a facility that is free of all off-limits-for-Passover grains, so if you’re on the more religiously observant side, you may want to err on the side of caution here.  And that’s all I’ll say on that topic.


Can you tell which is the “control” matzoh ball and which is the gluten-free one?

It took two days and 8 different experiments, but I am happy to report that the following recipe produced a matzoh-less quinoa “matzoh ball” that is firm but not dense, fluffy but not overly feathery. It tastes like a matzoh ball is supposed to taste, and it’s made with whole grain, high-protein, quinoa flakes instead of starchy or heavy alternatives.


Tamara’s Gluten-free Quinoa “Matzoh” Balls (or, Quatzoh Balls)

Makes 10 quinoa matzoh balls

Ingredients:

  • 1 cup quinoa flakes*
  • 1/2 tsp xanthan gum
  • 2 large eggs
  • 1/4 cup vegetable oil
  • 1/2 tsp salt (use regular iodized salt, not kosher salt)
  • A sprinkle of ground black pepper to your liking

* look for quinoa flakes in the hot cereal/oatmeal section of your grocery store, or order online from your favorite site.  Ancient Harvest is the most well-known manufacturer.

Directions:

  1. Measure out quinoa flakes and xanthan gum and combine in a small bowl.
  2. In a separate bowl, beat the two eggs.  Add oil, salt and pepper and beat again until combined.
  3. Add the wet ingredients to the dry, mix well until combined.  Cover and refrigerate for at least 30 minutes.
  4. Bring a large pot of water to a boil.  (You don’t want the matzoh balls to be crowded).
  5. Remove batter from refrigerator and wet hands.  With wet hands, fashion a SMALL amount of batter into a smooth ball shape and drop into the boiling water.  (For reference, the batter should be enough to make 10-12 matzoh balls, so portion each one accordingly.  Each uncooked ball should be no larger than the size of a ping-pong ball… they will expand when cooking, and if they’re too big, the middle may not cook through sufficiently.)
  6. Cover pot and cook the quinoa balls, maintaining a rolling boil.   Cook 40-45 minutes. To check for readiness, you can sacrifice one ball from the batch and cut into it.  The center should be cooked through, not dark, dry or dense.
  7. Turn off heat and let the matzoh balls sit in the cooking water to set for another 30 minutes or so. Then, remove the balls from boiling water with a slotted spoon and let sit to cool for a few minutes.  Refrigerate the balls until ready to serve.
  8. Before serving, place quinoa balls in pot of soup to warm them through.  Serve, and accept heaping praise from your gluten-intolerant guests at what a considerate host you are.

Click here to return to Recipe home

Low Fat Black Bean and Plantain Tamales
 

The great tamale makeover: Mashed plantains replace traditionally high-fat tamale dough to delicious results. (image T. Freuman)

When the universe closes a door, it opens a window.

And indeed it was so when our attempt to follow a recipe for a (naturally gluten-free) empanada using mashed plantains for the dough failed miserably.  The recipe’s chipotle-spiked black bean filling was nothing short of miraculous.  But while the plantain-based dough made a delectable fork-mate to the filling, it was too crumbly to respectably envelop it like a proper empanada pocket.  As I wallowed in our tasty but decidedly unphotogenic empanada experiment, my resourceful husband Alex had a brilliant idea: why not change the recipe from empanada to tamale?

And just like that, the window had opened.

A healthy tamale?  ¿Es posible?

Fact #1: Tamales are quite delicious.

Fact #2: Tamales are typically made with a dough that combines masa harina (cornmeal made from corn that’s been soaked in limewater) and a somewhat obscene amount of fat–usually butter or lard.  The lard renders most restaurant tamales off-limits to the vegetarian crowd, and even the butter-based approach makes homemade tamales a tough sell for those of us trying to keep our intake of artery-clogging saturated fat to a minimum.

Given these two facts, the prospect of a tamale dough that’s appropriately textured, 100% fat free, vegetarian and nutritious is a pretty big coup.

A coup, I’m delighted to say, we pulled off, thanks to some cooked mashed plantains and a little bit of creativity.


Ripe plantains are yellow with black mottling

Plantains (plátanos in Spanish) are a fruit that resemble large, thick-skinned bananas and are commonly featured in Caribbean cuisine.  They are used both when unripe (green skin) as well as ripe (yellow to black skin); they are starchier when unripe and sweeter when riper.  Although related to the banana, plantains are usually cooked prior to eating; they have a drier, starchier texture and less banana-ey flavor than bananas.  Nutritionally, they’re closer to a starchy vegetable (like a potato) than to a fruit.  Like potatoes, plantains are a great source of blood-pressure-lowering potassium.  And as I recently discovered, when baked, mashed and lightly salted, plantains provide an excellent, fat-free alternative to a traditional tamale dough. Of course, a quick google search after-the-fact revealed that Alex and I were not the first people to come up with the idea of Plantain Tamales (hmmmph!), but I’m still pretty darn proud of us all the same.

Black Bean & Plantain Tamales 

This recipe was inspired by and adapted from a recipe for Roasted Plantain Empanadas from NYC’s Dos Caminos restaurant’s “Mod Mex” cookbook, by Scott Lundquist and Joanna Pruess.  (The more-addictive-than-crack black bean filling is taken exactly–and reverently– from the cookbook.  I’d suggest doubling the recipe, in fact, if you’d like to serve extra on top of the tamales… or perhaps to accommodate nibbling while you wait patiently for the tamales to cook.)  And if tamales seem like too much work, try making just the filling for omelets or to serve with rice… it’s SO very good.

Makes 6 tamales (serves 2 as an entree or 3 as an appetizer)

Ingredients:

  • 6 dried corn husks, soaked in warm water for 10-15 minutes until soft and bendable

Tamale "dough":

  • 2 medium ripe plantains (skins should be yellow speckled with black or mostly black)
  • 1/2 tsp salt
  • 2 TBSP chopped fresh cilantro

Tamale Filling:

  • 1 TBSP canola oil
  • 1 small yellow onion, finely chopped
  • 1 clove garlic, finely chopped
  • 1/2 cup canned black beans
  • 1/4 cup water
  • 1 canned chipotle chile in adobo sauce, chopped
  • kosher salt
  • 1/4 cup chopped scallions (including green parts)
  • 1 ounce grated cheese (your choice of cotija, feta, pepper jack or sharp cheddar will all work great)

Directions:

Ready to fold: plantain dough topped with black bean filling (image T.Freuman)

  1. Preheat oven to 350 degrees.
  2. Soak the corn husks in warm water in a large shallow baking dish (per above instructions) prior to getting started.
  3. Make the tamale “dough”: Bake the whole plantains (unpeeled) on a cookie sheet until they are black, bubbly, splitting open and soft in the center.  Remove from oven, let cool and peel.  Place the baked plantains into a food processor with 1/2 tsp salt and chopped cilantro and mix until mashed.  The mixture will be a little dry and crumbly.  Add 1 TBSP water and briefly mix again until a uniform, smooth paste texture is achieved (depending on your plantain’s texture, you may need to adjust the amount of water… if 2 TBSP doesn’t yield a smooth texture, add 1 tsp additional water at a time until you get there.)

4. Make the tamale filling: Heat a medium, non-stick skillet over medium heat.  Add oil, then onion, and saute until onion is lightly browned–about 5-6 minutes.  Stir in garlic, cook 1 minute, then add black beans, half of the water (1/4 cup) and the chopped chipotle chili.  As the filling cooks, mash the mixture with a potato masher (or back of a wooden spoon) until chunky-smooth.  Add remaining 1/4 cup water, season to taste with salt.  Add the chopped scallions, the grated cheese and remove from heat.

5. Assemble the tamales: Lay a pre-soaked corn husk flat on working surface.  Spoon ~1/4 cup tamale dough (mashed plantain mixture) onto center of the husk and, using your fingers, spread it on the husk leaving a 1″ border all around.  Spoon 1/6 of the bean mixture across the dough.  Fold the tamale shut as follows: start by pulling up the longer edges of the husk until the edges of the plantain mash meet and fold over onto themselves, forming a tube around the bean filling.  Then, tuck one edge of the husk between the outside of the dough tube and the other husk.  Now you will have a tube-like tamale open on two sides.  Then, fold one of the remaining open sides so that the tamale has only one open end. 

6. Steam the tamales: Drop a penny into a large saucepan and fill with water up until the level of a steamer basket. Bring water to a boil; you will hear the penny rattling around so long as there is sufficient water in the pot.  (Over the course of the cooking time, listen for the penny rattling and add more water to the pot if the rattling sound stops.)  When water is boiling, pile the folded tamales into steamer basket, seam side down, cover saucepan with a tight-fitting lid, and steam for 45 minutes, replenishing water as needed.

7. To serve: Remove tamales from steamer basket.  Place on a plate, unfold the husk, and garnish with salsa of your choice (a chipotle salsa or salsa verde would work great), some additional shredded cheese and/or chopped cilantro to your liking.

Click here to return to Recipe home

Japchae Noodles
 

Japchae Noodles (image T. Freuman)


I’ve wanted to try making Korean Japchae noodles for ages, but abandoned the project prematurely when I discovered one of the local Korean markets in my neighborhood didn’t sell the star ingredient– sweet potato starch-based vermicelli. Since this signature dish at Korean restaurants contains soy sauce (not gluten-free for a celiac gal like me), I knew that if I was ever going to taste Japchae noodles, I’d better make them myself.

Sweet Potato Vermicelli (ingredients: Sweet Potato starch, water)

But after securing the elusive noodles at a local Asian supermarket,  I was in business.  And a small small bundle of additional ingredients later– 1/4 lb of fresh shiitakes, a carrot, some scallions and a bag of baby spinach leaves– I was headed home to try my hand at Korean cooking.

I followed this recipe from Chow.com almost to a tee, swapping out the regular soy sauce for reduced sodium, wheat-free Tamari sauce instead.  It was a FUN recipe to make!  The highlights for me were using kitchen shears to trim fat, sesame-oil slicked noodles into manageable segments (a project I’d recommend you allow an older child to help with… it’s such a tactile pleasure to slice through those plump, slippery things!) and practicing my knife skills to achieve matchstick carrots and paper-thin shiitake slices that would find camouflage enough in the noodles so that my kids won’t pick them out.  To keep this dish interactive, try letting toddlers and preschoolers sprinkle their own sesame seeds on top when serving.

Click here to return to Recipe home

Bok Choy Salad with Peanut Vinaigrette
 

Bok Choy Salad with Peanut Vinaigrette (image T. Freuman)

I don’t know about the rest of you, but I completely overdid it this past Thanksgiving weekend.

I’m in serious reining it in mode, and have committed to low carb, vegetably dinners for this coming week– salads and vegetable soups.  Which means I’ve made a big batch of the only salad I could possibly stand to eat for a week straight: the crunchiest, most flavorful, packed-full-of-goodies salad I know. In case you haven’t met it yet, allow me to introduce you to this surprising Bok Choy Salad with Peanut Vinaigrette.

My mom once got the recipe from her friend, and we’ve been making it for years.  Over time, we’ve modified the dressing recipe to be waaaaay less sugary, and the salad is no worse for the wear.  This salad is a less common way to use bok choy, a most nutritious cruciferous vegetable that’s more likely to be stir fried or sauteed than it is to be eaten raw.  Which is odd, since raw bok choy beats most lettuces for crunch, but isn’t excessively tough and fibrous like raw kale and cabbage often are.  You can also use this vegetable salad as a base for proteins to add a bit more substance; some sauteed shrimp or chicken would be lovely, as would soy-marinated sliced steak or Asian- flavored baked tofu or tempeh.

Folks whose digestive systems disagree with the other cruciferous family veggies– like broccoli, brussels, kale and cabbage– may find that bok choy is the distant relative who they can tolerate.

Bok Choy Salad with Peanut Vinaigrette

Ingredients:

  • 2 bunches bok choy (or 4 bunches baby bok choy), chopped
  • 4 scallions (greens only for low FODMAP), thinly sliced
  • Dried cranberries (amount to taste; a 5oz package is not unreasonable)
  • Sunflower seeds (amount to taste)
  • Toasted slivered almonds or sliced almonds (amount to taste)

Toss together all of the salad ingredients.

Peanut Vinaigrette:

To make the vinaigrette, whisk together the following ingredients very well until uniform consistency.  Leftover dressing can be stored in a sealed container in the fridge, and brought to room temperature again for future use.

  • 1/2 cup olive oil (replace half with garlic-infused olive oil if making this low FODMAP)
  • 1/2 cup white vinegar
  • 1/4 cup sugar
  • 2 TBSP soy sauce (can use gluten free Tamari soy sauce to make this gluten-free)
  • 2 TBSP crushed garlic (omit this ingredient if making low FODMAP)
  • 2 TBSP smooth peanut butter
  • dash of salt and pepper to taste

Click here to return to Recipe home

Allergen Free Latkes (Potato Pancakes)
 

Allergen Free Latkes (Potato Pancakes) (image T. Freuman)

This is the fourth year in a row that I’ve brought my latke-making show on the road to my children’s school, staking out a corner in their classroom to fry up a seasonal storm of potato pancakes.  My trusted sidekick is en electric skillet that’s over a half century old–it once belonged to a great aunt– which I break out precisely once per year.  The electric skillet is my absolute favorite way to make latkes, as it keeps the oil temperature constant for evenly-cooked pancakes, and allows me to set up my frying station in any corner of the kitchen (or classroom) where there’s an outlet.

While I’ve toyed with a variety of latke recipes over the years, my forray into classroom cooking required me to depart from the typical cannon: potatoes, onions, egg and flour or starch.  That’s because my children’s former preschool was vegan, so I needed to find some sort of way to bind my batter without egg.  I did experiment with some online eggless recipes that called for potato starch as the only binder, but I found that as the batter sat around in the mixing bowl waiting to be fried, potato liquid began pooling at the bottom, making the batter watery and necessitating ongoing attention with more and more starch to sop it up. Too much maintenance.

I don’t know how the idea struck me back then, but I decided to see whether a bit of cooked oatmeal (from quick-cooking, gluten-free oats) might stand in as a batter binder instead. It worked like an absolute charm, and I’ve been making my latkes with oatmeal ever since. Using cooked oatmeal as a secret latke ingredient has other benefits besides binding, too.  It keeps the recipe vegan and gluten free, which allows even diet restricted friends to partake of the deliciousness.  The oatmeal coats the grated potatoes in a manner that seems to prevent them from browning, and it soaks up any liquid the potatoes may weep, as well; this means you can make the batter at home and transport it to a second location for cooking a little while later without a loss of quality or cohesiveness even as it sits.

The following is my base recipe and technique. You can double it to feed larger crowds.

Gluten Free, Vegan Latkes

Serves 6-8 as a side

Equipment:

  • 1-2 absorbent dishtowels, preferably darker colors
  • Electric skillet
  • Box grater
  • Roll of paper towels
  • Thin, slotted spatula

Ingredients:

  • 4 medium to large Russet potatoes, peeled (keep in bowl of cold water before grating to prevent browning)
  • 1 large onion, peeled and grated (this can be done the night before to save time)
  • 1/4 cup dry, quick cooking, gluten free oats
  • 2 tsp salt
  • Oil for frying (canola, grapeseed, avocado all work well for high heat)
  • Optional to serve: Applesauce, Sour Cream or Creme Fraiche (I like Green Valley Organics Lactose Free Sour Cream).

Directions:

  1. Prepare oatmeal according to package directions, using slightly less water than it calls for to ensure a dense, thick oatmeal. Set aside.
  2. Squeeze grated onion over the sink to remove as much excess water as possible. Place onion in large mixing bowl when done.
  3. Grate potatoes one at a time.  After finishing each potato, squeeze the gratings with both hands over the sink to remove excess water. Next, place the squeezed-out gratings in a horizontal line across the center of a spread out clean dishtowel.   Fold the towel over to cover the gratings while you work on the rest of the potatoes. Repeat the grating-squeezing process with each of the remaining potatoes.
  4. When all 4 potatoes are grated and piled across the center of your dishtowel, roll up the towel lengthwise and twist the edges as tight as you can to squeeze out as much extra water from potatoes as humanly possible. (It will look like a long piece of taffy or a tootsie roll.) The towel should start feeling moist as the liquid soaks through.  Keep squeezing and twisting for about a minute.
  5. Once all 4 potatoes are squeezed as dry as possible, place the shreds into the large mixing bowl, along with the onion.  Add 1 tsp salt and the cooked oatmeal. Using your hands, combine the batter very well until fully blended.
  6. Heat oil in the electric skillet to 375 degrees until it is starting to shimmer.
  7. As oil heats, line a serving tray or large plate with paper towels.

8.  Drop batter into the skillet in ~2 TBSP mounds, flattening them a bit to ensure they cook through.  When edges are golden brown and latkes release easily from the pan, they’re ready to flip.  Cook the second side until golden brown.  Remove from skillet when done and place on paper towel lined plate, layering more paper towels as the plate fills.

Add oil to the skillet as needed to ensure surface is well slicked as you continue to fry additional batches.

Click here to return to Recipe home

Gigante Bean Salad
 

Gigante beans: Some foods are OK to supersize

If you know not the creamy comfort that is biting into an enormous and aptly-named gigante bean, then it is my mission today to convince you to seek out this elusive packet of leguminous deliciousness.

While many folks profess to like beans, they fail to see what inspires my unbridled passion for these little packets of complex-carbohydrate goodness.  After all, the American bean vocabulary tends to be pretty limited: we know garbanzos, kidneys, black beans and cannelinis.  Occasionally we dabble in pintos or black-eyed peas.  But unless it comes in a can, most of us can’t be bothered to expand our bean horizons.

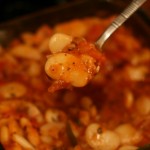
If ever there was a bean to inspire a nation to abandon its lazybean tendencies, however, surely the Gigante (aka: Gigande, Yigante, Hija) must be it. Most popular in Greek cuisine (yes, the same clever people who brought us geometry and democracy have also retained this most delicious of beans in their collective leguminous repertoire), gigante beans boast a divine creamy texture and the ability to maintain their shape after all sorts of cooking.  I decided it was time to start making my own gigantes after the $9.99/lb Antipasto bar at Whole Foods lured me in one time too many with that ridiculously delicious Gigante Bean salad of theirs.  (What kind of person spends $18.98 on an impulse bean purchase?!)  Like all bean varieties, Gigantes are an excellent source of complex carbohydrate, protein, fiber, antioxidants and a good source of iron.

Buying Beans

My new favorite place to buy beans is Purcell Mountain Farms, an Idaho-based farm with an excellent online store.  In addition to having the most reasonable prices for my favorite hard-to-find Gigante beans and Beluga lentils, they offer a surprising variety of organic and heirloom bean varieties with romantic names and fashionable appearances.  

If you are a bean buff and are interested in learning more about the folklore behind the wide, wonderful world of beans–as well as how to prepare them–I strongly recommend Aliza Green’s essential cookbook, Beans, from which I learned, for example, that Gigante beans are a variety of so-called “runner beans” that were brought to America from Greece and Spain.

Cooking beans from scratch

While I resisted it for years, I have come to discover that cooking beans from dry isn’t nearly as annoying as I had thought it would be. If you have the foresight to plan ahead, tomorrow night’s dinner beans into a big bowl of water in a ratio of about 3 cups water per 1 cup beans before you go to bed is the easiest way to prep your beans for a faster cooking time the next day.  And if you’re as Type A as I am, the feeling of accomplishment that comes with multi-tasking overnight will lull you into a happy, albeit geeky, slumber.   This would be the regular soaking method.

The quick-soaking method takes about an hour to an hour and a half.  In this case, you’d put your beans in a large saucepan so that they’re covered with 2 inches of water.  Bring the water to a boil and simmer for 2 minutes.  Then, turn off the heat, cover the pan, and let your beans soak in the water for 60-90 minutes, until tender.  Drain the water and proceed with your recipe.

The #1 rule when cooking any dry bean is to avoid adding acid of any kind with the bean until it is already tender.  Don’t add any vinegar, wine, citrus juice, tomato product or anything else acidic to the cooking water until your beans are nice and soft; otherwise, the acid will prevent your beans from softening no matter how long you cook them.

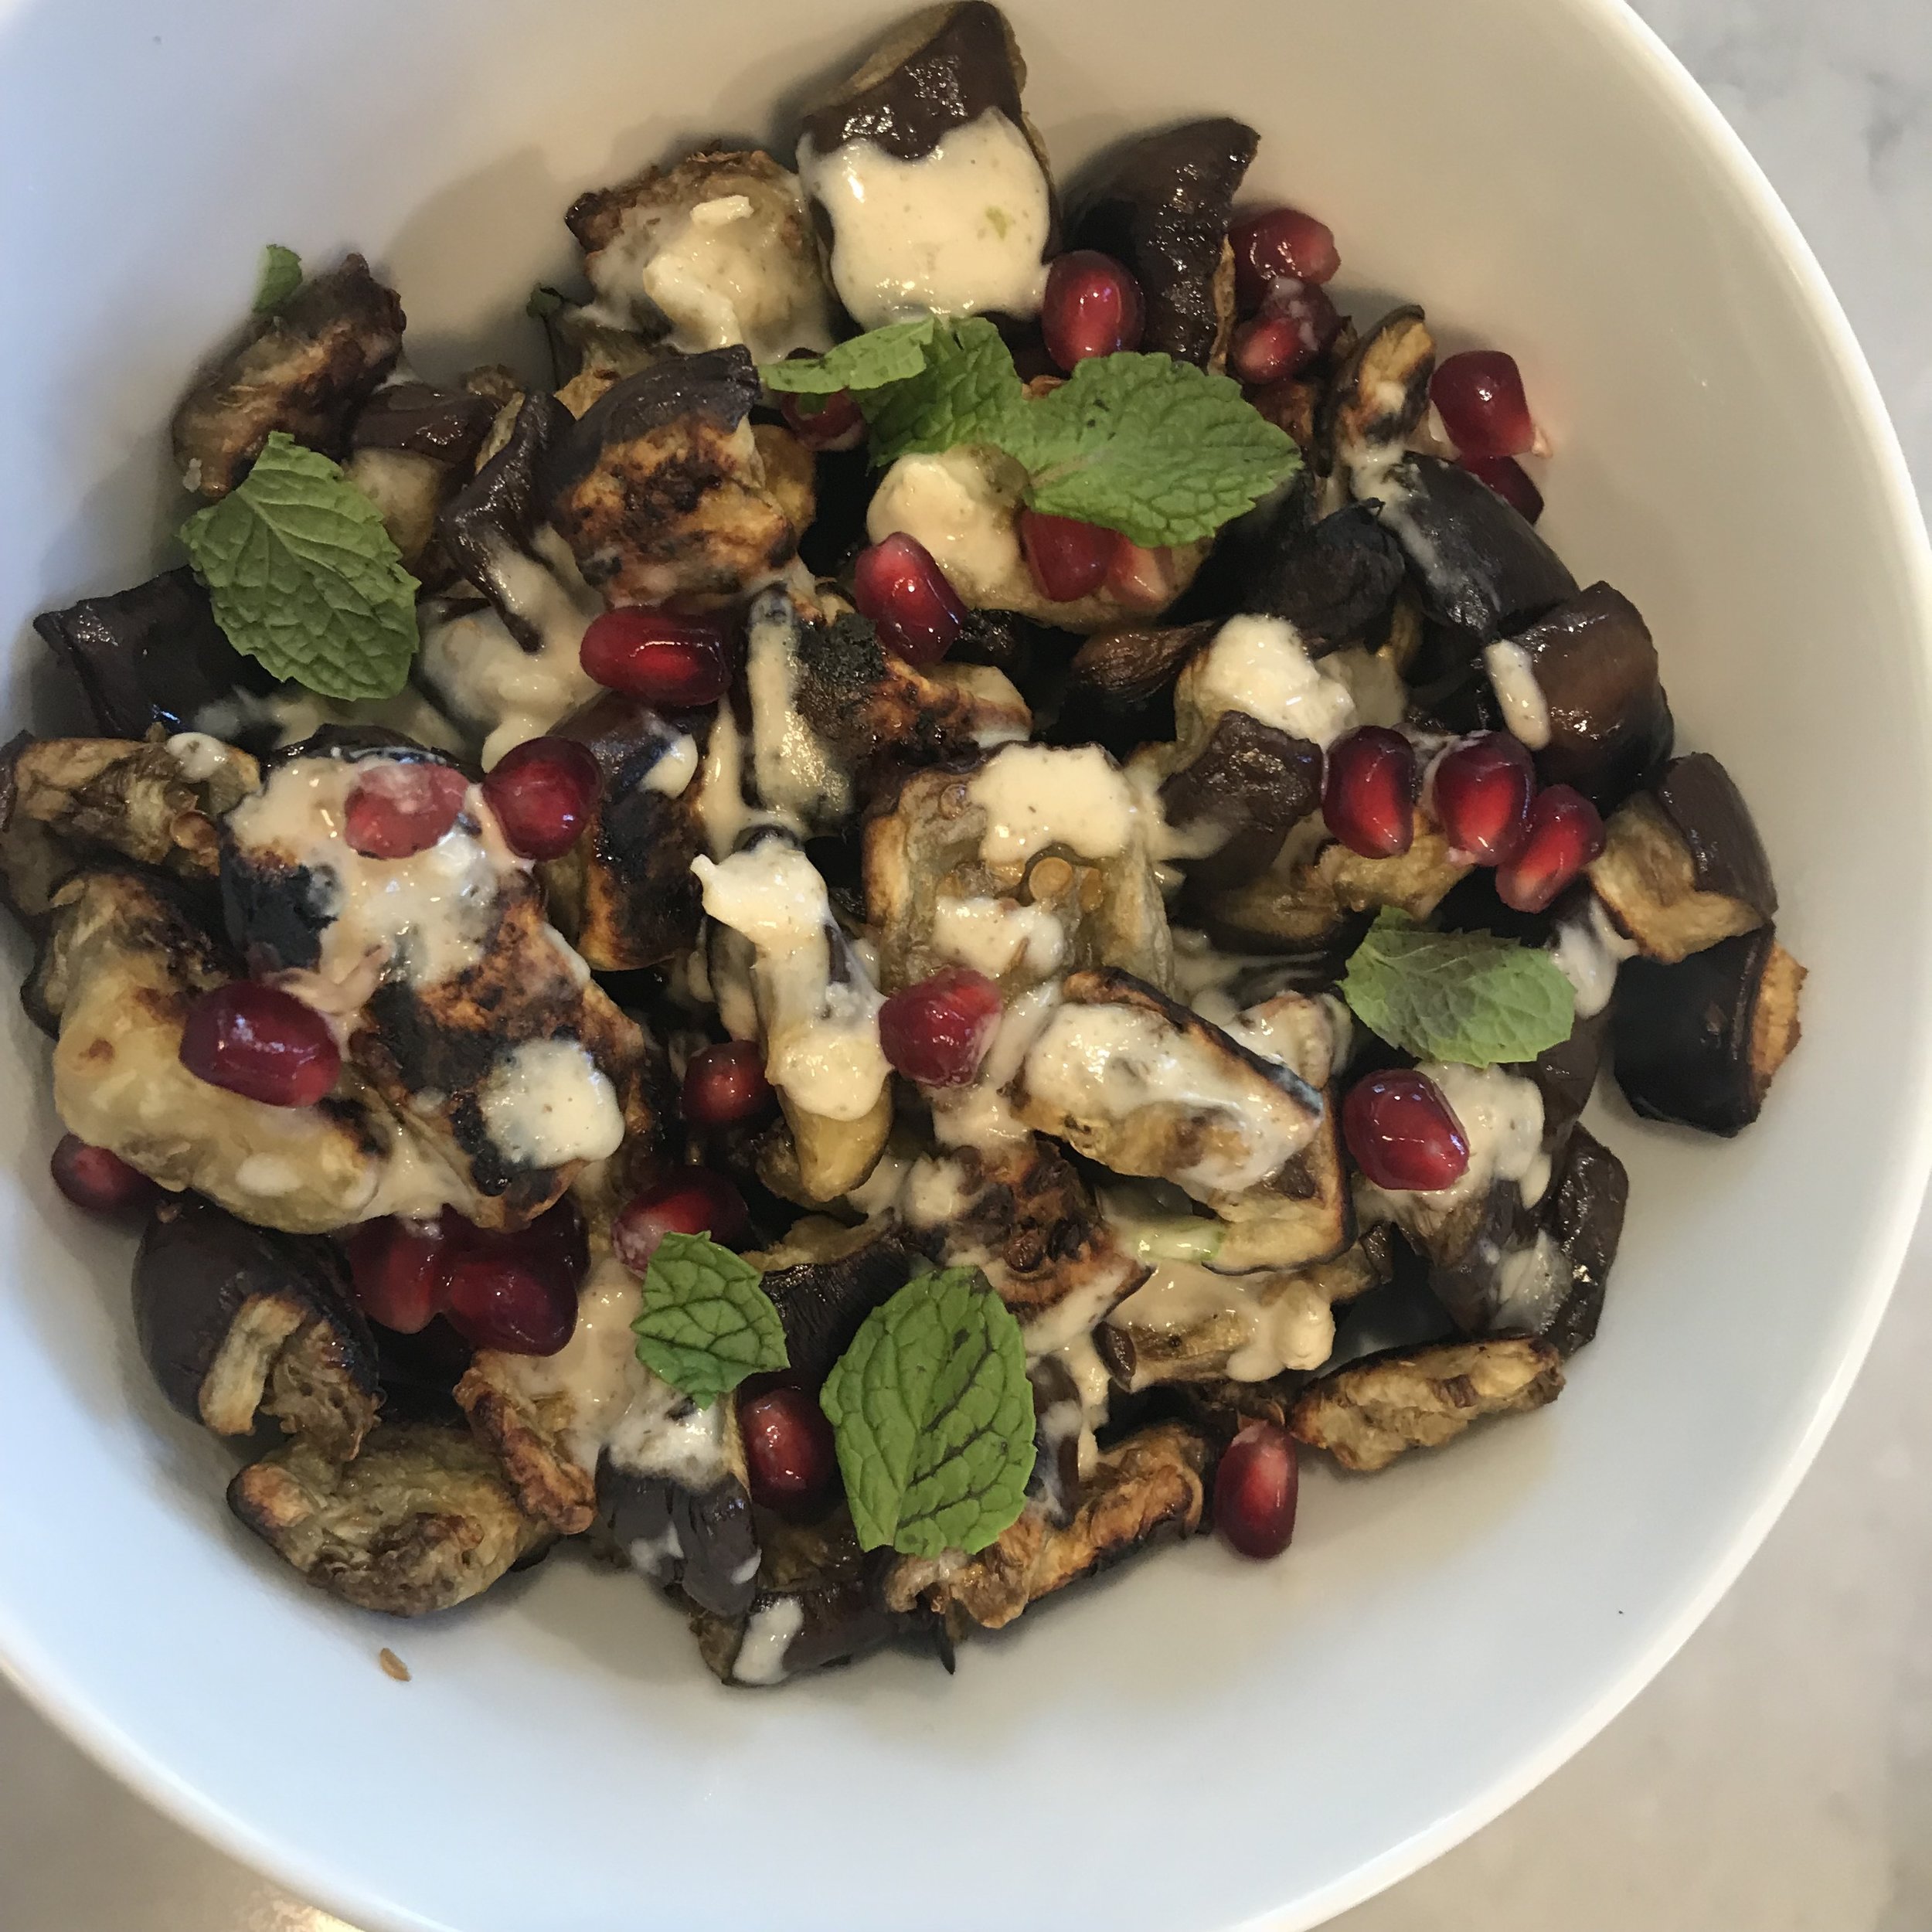
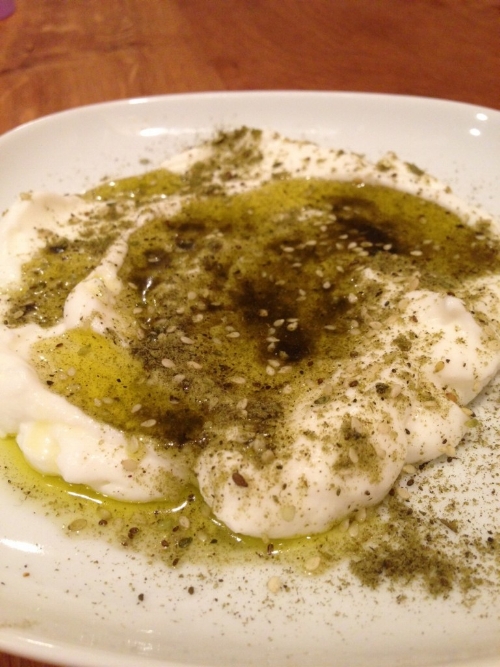
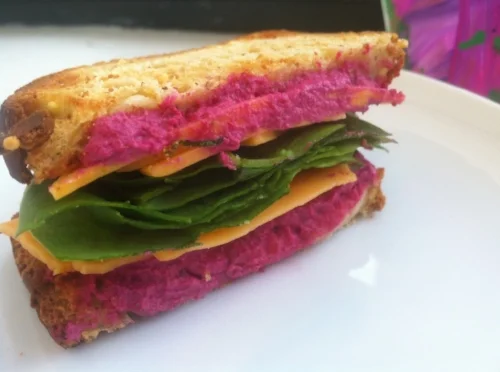
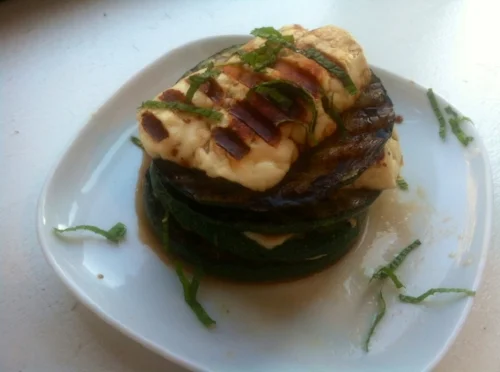
Gigante Beans: Two Ways

Yigandes Plaki: Loosely translates to "Why, oh why, was I not born to a Greek grandmother?"

I am obsessed with this first recipe for Greek-style Baked Gigante Beans, (aka Yigandes Plaki) which was adapted from Nancy Harmon Jenkins’  The New Mediterranean Diet Cookbook and posted on another food blog.  (Better they should have to deal with the copyright issues than me!)  While I’ll admit that it took forever and a half to make, I happen to live in a freezing old house and am all for any recipe that involves keeping the oven on for long periods of time.  (If you pre-soak your beans overnight, the first 40-50 minute bean simmering step can be cut in half.)  It strikes me that this recipe would be perfectly suited for a slow-cooker, but since I have yet to figure out how to use the slow-cooker I got for my wedding, I will defer to any ambitious crock-pot enthusiasts out there to adapt this recipe on our behalf.)  Since I didn’t have fresh herbs, I used a bunch of dry ones (including basil and oregano), which resulted in a final product that, in addition to being mouth-meltingly creamy, gave a similar flavor effect to lasagna…in the best possible way.  In fact, I would recommend serving it like you would lasagna; accompanied by a nice garlicky side dish of broccoli rabe or sauteed bitter greens to counteract the sweetness and bring some green to the plate.  It is absolutely delicious.  If your children don’t like this recipe, then send them back for a refund.

Another easy way to serve gigantes is as a room temperature bean salad appetizer.  Gigantes are commonly featured among the mezze in Greece, and a salad is a perfect way to pay homage to this civilized bean.  Mark Bittman offers an easy-to-follow formula for a Greek-style gigante bean salad in his modern kitchen staple, How to Cook Everything Vegetarian.

Of course, to replicate the Whole Foods Antipasto version that I’m so addicted to, here’s the closest recipe approximation I could come up with, reconstructed from the posted ingredient list on their salad bar signage:

Tamara’s Whole Foods Gigante Bean Salad Knockoff

Directions:

  1. Cook 1/2 lb of gigante beans per the cooking instructions above
  2. Roast 1 small red pepper and 1 small green pepper over open flame (your gas burner will do just fine).  Peel their skins off and slice peppers into super-thin strips.
  3. Mix cooked beans with 1/4 cup apple cider vinegar, 2 TBSP olive oil, 1 TBSP fresh chopped parsley, 1/2 cup (or more, to taste) or roasted pepper strips, 1-2 minced garlic cloves and salt to taste.
  4. Let salad marinate in fridge for several hours so flavors can blend.
  5.  Serve at room temperature.

Click here to return to Recipe home

Roasted Maitake Mushrooms
 

(image T. Freuman)

I’ll be the first to confess that elaborate mushrooms scare me a bit. The otherworldliness of enokis, the meatiness of King Trumpet stalks, the sponge-like texture of Lion’s Manes.

But I’ve been served Hen of the Woods enough at high-end restaurants to know that something delicious would await me if I could just bring myself to push past the awkwardness of our first face-to-face kitchen encounter. So I did. And I’m glad.

If the name Hen of the Woods doesn’t sound familiar, perhaps you’ve encountered this mushroom elsewhere under its Japanese name, Maitake? Maitakes get a lot of good press for their high antioxidant content, and they’ve even shown promise as a food with cancer-preventive potential.

We’re going to skate past the question of “why” to roast Hen of the Woods mushrooms, because the answer is quite obvious. In short:

  • They’re a delicious umami bomb
  • They make mundane foods like polenta, plain pasta, mashed potatoes or burgers extremely fancy
  • They’re insanely nutritious and are a part of your balanced, inflammation-taming, disease-preventing diet
  • You’re getting sick of roasting cauliflower

Now: Hen of the Woods mushrooms grow in a log-like cluster (below, top) that can be a bit intimidating. But once you approach the cluster with a knife, you can cut off little florets that have such a strong resemblance to cauliflower, that you’ll feel comfortable in no time (below, bottom).  As you take apart the mass of mushrooms into smaller florets, use your finger or a paper towel to dust off any little clusters of dirt embedded among the stalks.


Once you have the mushroom cluster cut down into florets, the rest is a cinch. Toss the florets in olive oil to lightly coat and sprinkle with salt. Arrange on a parchment paper lined baking tray. Roast in a 425 degree oven. Check on them after 10 minutes; smaller pieces may already be crisp on the edges. Remove these from the tray and put the tray back in the oven for another 3-5 minutes to get the larger pieces a little bit crispier. Remove from oven and serve!

Oatmeal Banana Bars (Low FODMAP)
 

Oatmeal banana bars (Low FODMAP) (image T. Freuman)

Have I gotten your attention yet?

We all have our ingredient buzzwords.  You know, those words your eyes gravitate towards on a menu and compel you to order the item that features them?

For most people, it’s probably bacon.  But in my case, peanut butter and banana are major turn-ons, and fortunately, I have bequeathed this passion to my kiddos, who will happily eat these foods in any incarnation.

Always on the search for a healthy, low-sugar, portable snack for the kinder, I came upon a great recipe on my local online mommy board for Oatmeal-Banana-Peanut Butter squares.  They were fast, easy, froze well, and when I brought them to the playground for my kids’ snack, I was like the Pied Piper of toddlers… they swarmed me like little toddler zombies in search of brains. The bars’ texture was soft, chewy and cake-like… but not so cakelike as to be crumbly.  Perfect, portable toddler fare.  I wish I knew this recipe’s origin so I could give proper attribution to its author!

Never one to leave good enough alone, however, I thought I could cram even more nutrition into these already wholesome snacks.  Since my dear son seems to have strong vegetarian (actually, fruitarian is more accurate) inclinations, I’m always trying to make sure he gets offered one or two iron-rich foods per day.  And while oats are naturally a good source of iron… so are chia seeds.  So I decided to spike the squares with some chia and see if the kids would notice the difference.

I’m happy to report that they did not.

I’m even happier to report that these can easily be made gluten-free by using certified GF quick-cooking oats (such as Bob’s Red Mill), that they make a great low-glycemic mid-morning or pre-workout snack, and are nutritious and delicious for kids and kids at heart alike.  The recipe as written contains < 1 tsp added sugar per bar, though if your banana is super ripe, you could probably even cut down on the brown sugar even further.  

Oatmeal-Banana-Peanut Butter-Chia Bars 

(Let’s call them “OBPB” bars, for short)

Ingredients:

  • 1 1/2 cups quick cooking oats (for gluten-free, use a certified GF brand, like Bob’s Red Mill)
  • 1/4 cup light brown sugar (not packed)
  • 3 TBSPs Chia Seeds
  • 1 tsp baking powder
  • 1/2 tsp kosher salt
  • 1 tsp ground cinnamon
  • 1 tsp vanilla extract
  • 1/2 cup milk (can use lactose-free or swap in a non-dairy milk if you prefer)
  • 1 large egg, slightly beaten
  • 1 large mashed banana
  • 1/4 cup creamy peanut butter

Directions:

  1.  Mix together the quick cooking oats, light brown sugar, chia seeds, baking powder, kosher salt and ground cinnamon.
  2. Add in the vanilla extract, milk and egg.
  3. Mix the ingredients together. Then add in the mashed banana and peanut butter.
  4. Combine all of the ingredients. Pour the mixture into a lightly greased 8 by 8 inch metal baking pan. Bake at 350 F degrees for 20 minutes. Cut into squares and enjoy!


Click here to return to Recipe home

Turkey Quinoa Burgers
 

Turkey Quinoa Burgers (image T. Freuman)

I hope this uncharacteristic recipe post for a turkey burger doesn’t turn off too many of my most dedicated vegetarian readers.  I personally follow a Mediterranean diet, which means lots of beans, whole grains and veggies, but also some poultry and fish.  I do feed my kids meat more regularly than I eat it myself, mostly because I've got an aspiring fruitarian son who teeters on the verge of anemia all the time, and I’m constantly obsessing about whether he's getting enough iron.

Not surprisingly, my latest experiment was to create a high-iron burger that was moist and delicious enough for the kids to accept, but healthy enough for the adults in the family as well. For the latter reason, I chose turkey instead of beef, though red meat does have more iron than turkey.  By using ground dark meat turkey and adding iron-rich quinoa as a binding agent, I thought I could compensate for some of the difference, while sparing us all the extra saturated fat.  (Oh goodness.. reading this out loud I just realized that Turkey-Quinoa burgers are exactly the kind of thing people imagine nutritionists feed their kids, aren’t they?  When did I become such a stereotype…?

Turkey-Quinoa Burgers

Makes 4 burgers

Ingredients:

  • 1/4 cup quinoa, rinsed
  • 1 medium shallot, minced
  • 1 clove garlic, minced
  • 1/2 cup grated zucchini (or substitute 1/2-3/4 cup well-chopped spinach)
  • 2 tsp olive oil
  • 1 TBSP Worcestershire sauce (can substitute Dijon mustard if you avoid fish)
  • 1 lb ground turkey (preferably dark meat/thighs)
  • Kosher Salt

Directions:

  1. Cook quinoa according to package directions in a very small saucepan.  You may need to add a bit of extra water to account for evaporation since the quantity is so small.  Note that 1/4 cup dry yields about 1 cup cooked.
  2. Meanwhile, while quinoa is cooking, saute the shallots and garlic in olive oil for 1-2 minutes until starting to sweat.  Add the zucchini (or spinach) and continue to saute for 2 minutes more until veggies are soft and sweating.  Remove from heat.
  3. Combine ground turkey, cooked quinoa, worcestershire sauce and sauteed veggies in a mixing bowl.  Add a generous pinch of kosher salt.  Mix with hands until well-blended.
  4. Form mixture into 4 patties of equal size.
  5. Grill burgers on a preheated grill until internal temperature reaches 165 degrees.  (About 10 minutes on an outdoor grill, flipped halfway through; 7-8 minutes on an indoor sandwich press grill, such as the Cuisinart Griddler, set at “high”)

Click here to return to Recipe home

Bella’s Stuffed Grape Leaves
 

I never much cared for stuffed grape leaves (or dolmas, as they’re known in Greek) until I tasted my mother-in-law’s version.  While I always found other grape leaves to be too briny or bitter or mushy or flavorless, Bella’s are taut little rolls of flavorful, textured rice filling wrapped in a leaf that’s been soaked to remove the tangy briny residue, and marinated in a heavenly lemon-juice-olive oil-garlic sauce until they soak up its Mediterranean deliciousness. 

From the moment I first tasted one, I knew I had to have the recipe.

As soon as I asked for it, everyone just smiled at me pityingly.

Bella is a wonderful, self-taught, instinctive cook who has never used a recipe in her life.  Even when she owned her own cafe, and made authentic grape leaves, hummus and tabbouleh all from scratch, she still never used recipes.  I asked her how she managed to replicate her recipe each time, she replied that she just knows how its supposed to look.

Still undaunted, I decided to invite her over and have her give me a grapeleaf tutorial.  My plan was to write down the ingredients and quantities in a veritable public service effort to liberate the glorious recipe from her head and share it with the grape-leaf deprived masses.  I will preface the rest of this posting by admitting that I was only quasi-successful in my mission: I kinda-sorta pinned her down to a recipe whose quantities will fill a 9×13 baking dish stacked with 2 layers of tightly-packed stuffed leaves, about 80 total.

Please forgive the loosey-goosey nature of the pseudo-recipe below.  Believe me when I say it is a veritable coup that I even managed to wrangle this out of her.  To compensate for the shortcomings, I provided some photos so that you can see what things are supposed to look like at different stages, which is Bella’s preferred gauge.  And of course, taste as you go and feel free to improvise.

Bella’s Stuffed Grape Leaves

Ingredients:

  • 16 oz of jarred grape leaves

For the filling:

  • 3 cups uncooked white rice
  • 1 cup uncooked quinoa or millet
  • 1 cup pine nuts or sunflower seeds, toasted
  • *approximately* 1/2 cup fresh mint, chopped (or, a bunch of peppermint tea bags opened up, contents added to the rice until it looks like the photo below.  Sorry… I told you this was only a pseudo-recipe.)
  • Dried parsley, maybe about 2 TBSP?  Can be substituted for fresh parsley or freshly chopped chives, too.
  • Salt and pepper to taste.  Spicy Hungarian paprika to taste, optional.

For the marinade:

  • 1/2 cup lemon juice
  • 1/2 cup olive oil
  • 1 bulb garlic, crushed
  • A handful of fresh mint, chopped
  • Salt and pepper, to taste

Directions:

  1. Soak the jarred grape leaves in a big mixing bowl full of cold water to remove the brine.  Dump water and repeat 2-3 times until the leaves don’t taste salty or feel slimy from the brine.
  2. Preheat oven to 350 degrees.
  3. Cook the rice and quinoa separately per package instructions.  (~4.5 cups water for the rice and 2 cups water for the quinoa).
  4. Meanwhile, while rice is cooking and leaves are soaking, toast the pine nuts or sunflower seeds in a dry saute pan or toaster oven, just until golden/fragrant.
  5. In a large mixing bowl, combine the cooked rice, cooked quinoa, pine nuts/sunflower seeds, mint and parsley.  Season to taste, making sure the mixture is salted enough that it would taste good if you were to eat it as a side dish.  It should look like this (See Step 5 below):
  6. Meanwhile, make the marinade.  Combine lemon juice, olive oil, crushed garlic and chopped mint into a small bowl, and season with salt and pepper.  The marinade will be very strong– garlicky and tangy.  That’s what you want.
  7. Using your now-drained but still wet grape leaves, lay one grape leaf flat on your working surface.  If it has tears or holes in it, place a smaller leaf on top of it to patch it up.
  8. Spoon a small amount of rice filling onto the base of the leaf and use your fingers to pinch the rice into a more compact row.  See Step 8 below.
  9. Begin wrapping the grape leaf from the base, pulling the leaf base tightly over your rice mound.  Fold in the sides like a burrito and finish rolling.  The final product should be tight and compact.  Place the stuffed grape leaf into your baking dish, and pack them in tightly together, with the end flap down, as you continue to roll more.  When the bottom of the dish is full but before you start stacking the second layer, drizzle half of the marinade on top of the stuffed leaves. See Step 9 below.
  10. Continue rolling and stack a second layer on top until the baking dish is full. Drizzle the second half of the marinade onto the top of the second layer of grape leaves. See Step 10 below.
  11. Now, fill the baking dish with some water until it’s ~3/4 up the sides of the dish.  (I know it sounds weird, but it will help cook the grape leaves through and will boil off in the oven.)  Cover with aluminum foil and cook for 30 minutes, then remove the foil and cook for another 30 minutes, until the water boils away.  The top layer of grape leaves will be a little dried and brown, but shouldn’t be burnt. The bottom layer will be softer, but more saturated with flavor.  

Bella’s grape leaves taste best on the second day once they’ve been soaking in their delicious marinade overnight and after being reheated in the oven until warmed through.  (Or, microwaved in a pinch).  Even better, pour some more lemon juice and olive oil on the grape leaves before re-heating.  

Now, if I could just get her to give up her hummus recipe…

Pink Stuff (Beet & Sunflower Seed Spread)
 

Pink Stuff (Beet & Sunflower Seed Spread) (image T. Freuman)

I’ve always found vegetarian sandwiches to be a bit uninspired.  It can be hard to come up with enough substance to make the sandwich satiating– a pile of vegetables just doesn’t do it for me. To be sure, the vegetarian sandwich pantheon has some pretty great occupants: a good egg and cheese; a well-seasoned roasted vegetable with goat cheese; an avocado and cilantro with lime juice and sea salt; pesto grilled cheese; hummus and cukes.  But this rotation gets old after awhile, and variety is indeed the spice of life.

Of course, I’d eat peanut butter sandwiches happily until the day I die.  But nowadays you can’t always pack a PB&J to bring into public spaces, particularly if you’re making a picnic for your kids that will be eaten in public shared spaces, as nut-free zones abound.

So you can imagine how revolutionary it was to discover an entirely new sandwich condiment– a nutrient-packed, vegan and densely-flavored one at that– which would serve as the basis for a whole new category of vegetarian sandwiches I could add to my repertoire.  This condiment–which hails from Germany and is called simply “streichcreme” (rote Bete-meerrettich)– has been dubbed “pink stuff” by my kids.

This sandwich spread is ubiquitous in Germany, and my sister in law always brings us a jar when she visits from Hamburg, where she now lives.  It’s a silky-smooth, magenta colored spread whose primary ingredients are roasted beets, sunflower seeds and horseradish.  It tastes more of mild horseradish than beets or sunflower seeds, in my humble opinion, and is positively addictive.  My kids like to dip mini Triscuits in it as if it’s hummus.  I’ve found it most appealing as the basis for a savory breakfast sandwich, paired with cheddar cheese and a handful of peppery arugula leaves (pictured above). I've turned many of my patients on to this breakfast sandwich, and they're as obsessed as I am. 

Since German ingredient labels list ingredients by percentage, I decided to try to reverse-engineer this product.  After a few attempts, I came up with this recipe as the closest approximation to the real deal.  My homemade version is more rose colored than magenta, owing to the fact that I don’t have the benefit of “roasted beet concentrate” in my pantry, but the flavor is similar enough. Of course, if you happen to know someone traveling over there for any reason, ask them to pick up a jar for you as a souvenir so you can compare this homemade version to the original.

Pink Stuff (Roasted Beet & Horseradish Spread)

Yield: ~1/2 pint plastic deli container’s worth

Ingredients:

  • 3 small roasted beets, about 5-5.5 ounces (I lazily used pre-cooked ones from Love Beets; homemade roasted beets would probably have an even better flavor)
  • 3/4 cup roasted sunflower seeds, unsalted
  • 1 TBSP olive oil
  • 1 TBSP + 1 tsp Gold’s prepared horseradish (sold in the refrigerated section of the supermarket, near the cream cheeses, butter and eggs)
  • 1 TBSP lemon juice
  • 1/4 tsp kosher salt

Directions:

  1. Combine all ingredients in a food processor and process until well blended and very creamy textured.  You may need to stop a few times to scrape the sides of the bowl with a spatula to ensure all ingredients are well combined.
  2. Store in refrigerator.

To make Pink Stuff Sandwiches:

  1. Spread pink stuff on both sides of your favorite toasted bread, regular or gluten free
  2. Top each side with 1/2-1 slice of orange-colored cheddar cheese (for visual effect)
  3. Top one side with a handful of washed baby arugula leaves
  4. Cover sandwich and serve.

Click here to return to Recipe home

Zucchini Halloumi Napoleon
 

Zucchini Halloumi Napoleon (image T. Freuman)

If ever there was an homage to everything summer– grilled dinners, fresh mint and zucchini from the garden, simple, unfussy recipes– this lovely appetizer would be it.

This savory Napoleon recipe was inspired by summertime Caprese salads using fresh basil from the garden and sweet Heirloom tomatoes from the Farmer’s Market.  It’s a grilled version that combines some of my favorite ingredients– garden mint, salty Halloumi cheese, and globe-shaped summer squash.

What’s that?  You’re not familiar with halloumi?  Well, allow me to introduce you.  It’s a salty sheep and goat’s milk cheese with a firm, slightly rubbery texture, originally from Cypress.  I find it more pleasant than feta–with all due respect to the Greeks– as it’s less sharp and tangy.  Halloumi’s claim to fame–and what makes it a perfect summer cheese– is that it holds its texture when grilled.  In other words, it will soften and get grill marks like a slab of tofu, but won’t melt all over your grill.  Like other salty white cheese, halloumi is divine when paired with watermelon and mint in a salad as well.

Now, back to our Napoleon.  You can make this warm layered appetizer as I’ve written it, or you can improvise by adding additional layers of grilled tomato or eggplant.  Use round, globe-shaped ones for visual appeal if they’re available.  This will take your Napoleon into ratatouille territory, without all the fuss of sauteing.  If you can’t find globe zucchini, then use the biggest, fattest zucchini you can find and cut it lengthwise into four thick slabs, then halve each large slab.  Use two pieces each per later.  To turn this appy into a meal, serve it atop a bed of well-seasoned quinoa and lightly steamed spinach.

Grilled Zucchini-Halloumi Napoleon

Serves 4 as an appetizer

Ingredients:

  • 1 medium/large globe zucchini, sliced into 4-5 rounds of equal thickness
  • 1 8oz block of halloumi cheese, sliced into 4 rectangular slabs of equal thickness
  • 6-8 large fresh mint leaves (~1 TBSP chiffonaded)
  • Olive oil
  • Balsamic vinegar (preferably a thick, syrupy one)

(image T. Freuman)

Directions:

  1. Heat grill to medium (a countertop panini grill will work fine, too)
  2. While grill is heating, chiffonade the mint leaves.  (Stack them up, roll them into a log lengthwise, and slice into skinny strips horizontally.)
  3. Brush zucchini slices generously with olive oil on both sides.  (You do not need to season with salt; the halloumi is salty enough to flavor the dish.)
  4. Grill zucchini on both sizes until its tender and brown grill marks have formed; just a few short minutes.  Remove slices as they’re ready and set aside.
  5. While zucchini is grilling, brush halloumi slices with thin layer of olive oil to prevent sticking
  6. Place halloumi on the grill and cook until brown grill marks develop and cheese softens, just a few short minutes
  7. When both components are ready, assemble the napolean as follows: Zucchini later, halloumi layer, sprinkle of mint.  Repeat layers until all ingredients are used up.
  8. Drizzle with balsamic vinegar to taste.  Cut into 4 sections and serve!

Click here to return to Recipe home

Avocado Tacos
 

Avocado Taco (image T. Freuman)

If “taco night” takes your mind to a greasy place of fried tortilla shells stuffed with a generic combo of sloppy refried beans, ground beef, lettuce, shredded cheddar cheese and sour cream, then you’ve been missing out on the taco renaissance currently underway in major cities nationwide.

Soft tacos with fresh, flavorful and inventive fillings are the name of the game, and there’s no ground beef, refried beans or cheddar in sight.  While my heart belongs to the taco menu at Cascabel Taqueria (and their fabulous Luchador salad on the side), sometimes a girl needs a good, filling vegetarian taco option as well.  And this, as it turns out, is easier said than found.

I stumbled across the perfect vegetarian taco to satisfy my spicy craving in a nauseous haze during my first trimester of pregnancy, when the very thought of meat made my stomach churn: the Aguacate taco at La Esquina.

The taco was a delightfully overstuffed affair starring a gorgeous green hunk of avocado accompanied by a scrambled egg, nestled in a doubled-up soft corn tortilla and accessorized with black beans, citrusy salsa verde, pico de gallo and a crumble of white queso fresco.  (That’s a lot of taco to fit into a 6″ wrap… and a deal for just $3!)  When drizzled with my favorite hot sauce, El Yucateco, I was in taco heaven.

I recently decided it was high time to make my own version of this divine taco creation, staying true to the original concept but swapping out the pico de gallo for some gorgeous pink pickled onions… they’re so easy to make and they have a transformative effect on a workaday taco.  If you happen to have a grill going, I’d suggest grilling the avocado to take this recipe from divine to sublime, though the original version used raw avocado and was still perfectly delicious. Instructions on how to grill an avocado follow below.

Avocado tacos

(Makes 1 taco; multiply as needed)

Ingredients:

  • 2 soft corn tortillas
  • 1/3 fresh, ripe avocado
  • 1 egg, scrambled and fried
  • 1 heaping tablespoon canned black beans
  • Salt

Garnish:

  • Pickled onions (see recipe below)
  • Salsa verde (storebought)
  • Cotija cheese (aka, aged Mexican white cheese; or use other crumbly white cheese as available)
  • Fresh lime wedges

Directions:

  1. Sprinkle avocado with pinch of salt (alternate prep: grill avocado halves instead of serving raw.  See note below for directions on how.)
  2. Warm corn tortillas one by one in a frying pan over medium (no oil) until soft; stash warmed tortillas stacked on a plate covered by a kitchen towel to keep warm and soft until ready to serve.
  3. Double up corn tortillas and fill each duo with beans, egg and avocado (in that order).
  4. Drizzle salsa verde to taste.
  5. Top with pickled onions to taste.
  6. Sprinkle cotija cheese to taste.
  7. Squeeze a lime wedge over the fillings.
  8. Serve with your favorite hot sauce as desired.

To grill avocados: Slice avocado in half lengthwise and remove pit.  Brush with olive oil and lime juice.  Grill flesh side down on a hot grill until pretty grill marks appear, about 5-7 minutes.

Pickled onions

(Recipe from America’s Test Kitchen cookbook)

Ingredients:

  • 1 medium red onion, sliced very thin
  • 2 jalapenos, seeded and ribs removed, and sliced into thin rings
  • 1 cup red wine vinegar
  • 1/3 cup sugar
  • 1/4 tsp salt

Directions:

  1. Combine jalapenos, vinegar, sugar and salt in a small saucepan and heat until sugar dissolves.
  2. Pour mixture over sliced onions in a heat-resistant bowl; stir to ensure onion slices are covered
  3. Cover bowl and let steep for 30 minutes.
  4. After 30 minutes, pour off the liquid and discard.
  5. Store extra pickled onions in a sealed container in fridge for up to a week.

Click here to return to Recipe home

Pumpkin Paletas (Popsicles)
 

Pumpkin Paletas (Popsicles) (image T. Freuman)

I don’t remember all that much about the foods my mother made for us growing up, other than that things were pretty simple and homey.  Baked chicken with potatoes and broccoli.  Scrambled eggs with salami.  Macaroni and cheese with tuna.  Chopped liver on Ritz crackers (!).  Homemade desserts were equally simple: Chocolate pudding.  Frozen bananas.  Apple pie.  And then there were the pumpkin popsicles.

I’m not sure how these frozen pumpkin treats made it into the rotation, though if I had to guess, I’d bet my dad bought a huge pumpkin one year that, when gutted, left a glut of innards that needed to be purposed.  In any event, when colder weather came calling, these unusual, creamy pumpkin treats would show up in the freezer.  And this was years before popsicles became fashionable and before exotic ice cream flavors made frozen pumpkin treats de rigueur in the frozen confection section of specialty markets.  Now, I’m not trying to claim my mom invented Post-It Notes or the Internet, but I’m going to go out on a limb here and assert that she may have been an early pioneer of frozen pumpkin novelties.

I asked her recently if she could recall what went into her original recipe.  She claims they were made with leftover cooked pumpkin custard that was destined for pie; a blend of pumpkin puree, eggs, milk and sugar.  Interesting.  But far too much work (and sugar) for my purposes.

My goal was a low sugar treat whose creamy texture and warm flavors delivered seasonal indulgence without the requisite fat and calories.  One that didn’t require any cooking of ingredients; more like a frozen pumpkin smoothie than a frozen pumpkin pie.  To that end, I chose low-fat kefir for creaminess without the fat; some pumpkin pie spice and vanilla extract for flavor, and a touch of agave nectar to take the bland edge off of plain pumpkin puree and tame the tang of the yogurt to allow the warm, autumn flavors to come through.  The great thing about using agave is that it’s so much sweeter than sugar, so just a little bit can go much further flavorwise.  Also, it’s liquid, which makes it very easy to blend into this recipe.  I’ll admit that when the final product was done, even I was surprised at how low calorie and healthy these puppies were.  And satisfying!  

Lastly, I call them “paletas,” which is Spanish for “popsicles,” because I used to work in marketing and recognize that Pumpkin Paletas sounds way more interesting than Pumpkin Popsicles.  If you need to market these to xenophobic or neophobic relatives, other descriptive names that would be appropriate would include: Pumpkin Pie On a Stick or Frozen Pumpkin Spice Treats.

Pumpkin Paletas  

Makes ~6 pops (may vary depending on the size of your molds)

Ingredients:

  • 1 cup canned pumpkin puree (NOT pumpkin pie mix)
  • 1 cup lowfat plain kefir*
  • 1 tsp vanilla extract
  • 3 TBSP agave nectar
  • 1 tsp pumpkin pie spice  (note: if you don’t have pumpkin pie spice on hand, blend 1/2 tsp cinnamon + 1/4 tsp ground ginger + 1/8 tsp nutmeg + 1/8 tsp allspice or cloves)

Directions:

  1. Blend all ingredients in a blender until well mixed
  2. Pour into popsicle molds and freeze until solid

* To make these lactose-free (as I do), use Green Valley Organics lactose-free kefir**. To make vegan/dairy-free, substitute 1 cup LITE canned coconut milk.


What to do with Leftover Canned Pumpkin

It’s a first-world problem that we all face every fall: What to do with that extra bit of pumpkin puree thats leftover from piemaking?  In our house, I freeze any remaining puree in an ice cube tray.  When the cubes are frozen, transfer them to a freezer-safe ziploc bag.  Then, next time you’re making pancakes or waffles from a mix, defrost 2 cubes (about 2oz) of pumpkin puree and add it to the batter along with a dash of cinnamon or pumpkin pie spice.  Voila!  Pumpkin pancakes!

**FTC disclosure: I am a paid consulting dietitian for Green Valley Organics

Click here to return to Recipe home

Black Quinoa Stuffed Acorn Squash
 

Black Quinoa Stuffed Acorn Squash (image T. Freuman)

While the rest of the world is testing the upper limit of their insulin sensitivity on Halloween, I prefer to treat myself to a delicious, savory and very righteous black-and-orange meal instead.

Black quinoa-stuffed acorn squash fits the bill, both because the colors are right and because they are incredibly nutritious and delicious foods in their own right.  (Subliminally, the fact that acorn squashes kind of look like mini pumpkins may have played a role, too.)  Since I’m also on the hook to come up with a vegetarian entree option for our family’s Thanksgiving meal this year, I figured that developing this dish would give me a good practice run for the big day next month.  It was the Thanksgiving angle that inspired the flavor profile of the quinoa stuffing, in fact.  Why not stud it with Thanksgiving-stuffing-ish ingredients like savory sauteed onions, chestnuts, mushrooms, and sage to offset the sweetness of the squash?  And why not top it with a garnish of roasted squash seeds while I was at it?

It was all sounding so delicious that for a moment I almost believed squash and quinoa could be the next classic Halloween combo–right up there with chocolate and peanut butter.  (Alas, my husband assured me that it could not be, but conceded that it was damn delicious nonetheless.)

Black Quinoa Stuffed Acorn Squash

Serves 6

Ingredients:

  • 3 acorn squash, cut in half lengthwise, seeds and stringy membranes scooped out and set aside
  • Olive oil
  • 1 cup black quinoa, rinsed well
  • 1 cup diced onion
  • 1 tsp minced garlic
  • 2 cups diced mushrooms
  • 1 cup diced peeled chestnuts (from a jar; equivalent of about 1/2 cup of whole chestnuts)
  • 6 fresh sage leaves, minced
  • 1 tsp dried thyme
  • Salt
  • To garnish: Roasted acorn squash seeds (see instructions below)

Directions:

  1. Roast the acorn squash as follows: using your hands, rub the exposed squash flesh (flat part as well as the scooped-out cavity) with a thin layer of olive oil and sparse sprinkle of salt.  Place squash halves flesh side up on a baking sheet and bake at 375 degrees until the flesh is soft and cooked through.  (Depending on your oven and the size of the squash, this may take anywhere from 30-45 minutes, so keep an eye on them.  ).  When squash halves are roasted, remove from heat and set aside.
  2. While squash is roasting, cook the quinoa as per package directions and set aside when done.
  3. While squash is roasting and quinoa is cooking prepare the vegetables as follows:
    • Heat 1 TBSP olive oil in a large saute pan; when hot, add minced onion and cook until it starts to soften and become translucent, about 4 minutes.
    • Add minced garlic and stir for about 30 seconds
    • Add the minced mushrooms and chestnuts to pan, stir constantly until vegetables are well-blended and mushrooms cook down
    • Add the minced sage leaves and thyme leaves; stir until blended.
  4. Add the cooked quinoa to the vegetable mixture in the saucepan and stir until well-blended.
  5. Add salt to taste
  6. Fill the hollowed-out squash with quinoa/vegetable mixture
  7. Garnish with roasted acorn squash seeds (see directions below) and serve!

Roasted Acorn Squash Seeds

Directions:

  • Rinse seeds in a colander under running water to remove excess flesh/stringy membranes.
  • Spread clean seeds on a paper towel and allow to dry thoroughly
  • When dry, toss seeds with just enough olive oil to coat and sprinkle with salt
  • Spread seeds out on a baking tray so that they’re not overlapping
  • Bake for 15 minutes at 275 degrees (preferably in a counter-top toaster oven, or until golden brown)

Click here to return to Recipe home